Table of Contents
- Plugin overview
- Asset Action
- Asset Factory
- Asset appearance
- Asset Action Fragments
- Deleting assets
- Common issues
Plugin overview
Making editor tools for creating and placing assets is a tedious and time consuming process, and usually requires C++ to set up. Easy Asset Creator makes it easy to create tools for your assets, and all of it can be managed inside the editor with no requirements for an editor restart.
Asset Action
Asset Action is the core of Easy Asset Creator and it handles how your class is gonna be exposed to the different editor menus.
You need one Asset Action for each asset you want to expose.
Create an Asset Action
Start by right clicking in your content browser/drawer to create an Asset Action.
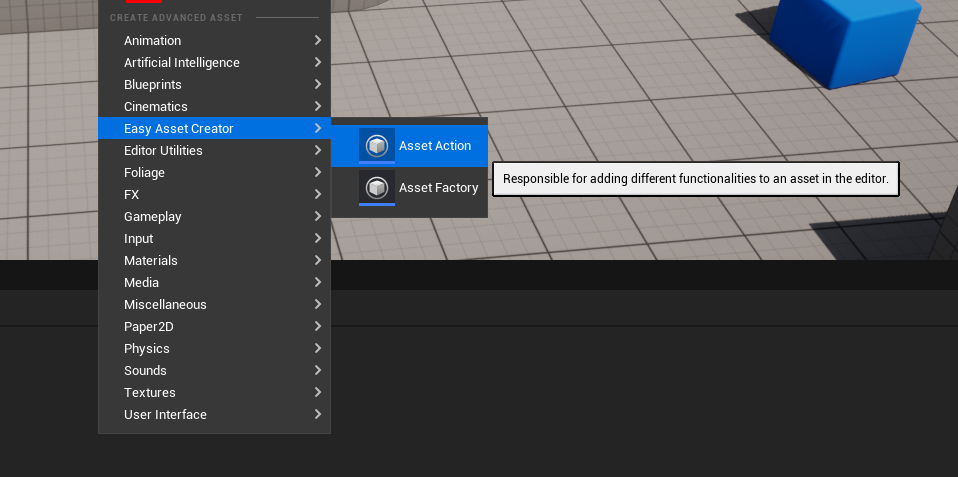
And just choose the Asset Action class:

Now you have your first Asset Action class ready!
Fun fact: The Asset Action and Asset Factory entries in the Easy Asset Creator category are exposed via custom Asset Action classes in C++.
Setting up your Asset Action
Open the Asset Action and go to the Class Defaults menu:
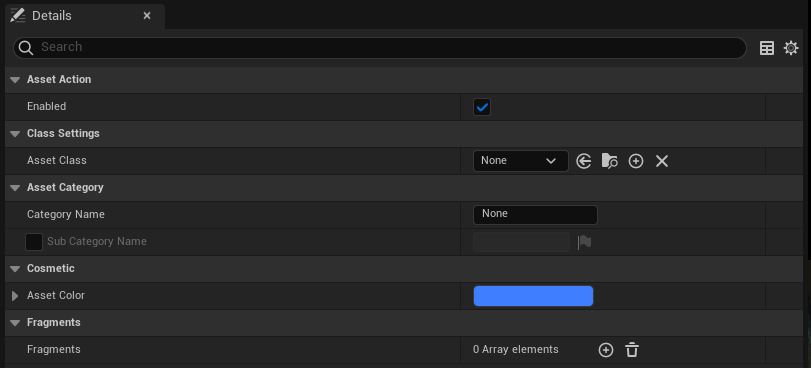
Choose the asset you want to expose in the Asset Class variable:

Now assign the category this asset should be exposed to in the different menus:

Now you are all done for the basic setup of an Asset Action!
Sub-category
You can only add a sub-category if two or more classes are in the same category. Then assign a sub-category name to one of them, and you will get this:
Asset Factory
Factories are responsible for creating the actual asset and give it its name. Due to current engine “limitations”, you unfortunately need both classes to expose your assets.
Create Asset Factory
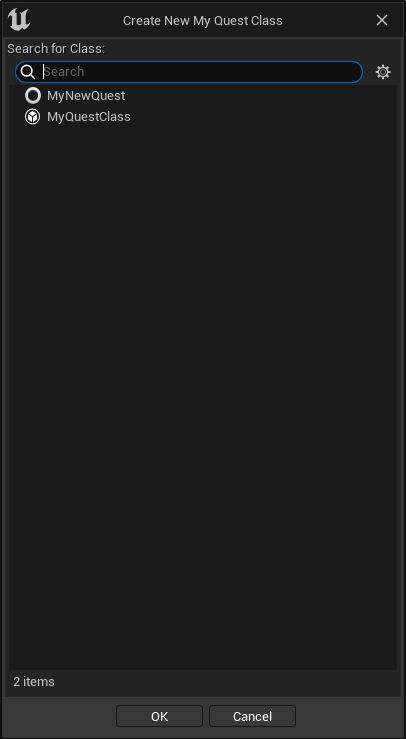
Start by right clicking in your content browser/drawer to create an Asset Factory.

Now you have your first Asset Factory class ready!
Setting up your Asset Factory
Open the Asset Factory and go to the Class Defaults menu:
Now assign the same asset in the factory as in the Asset Action:

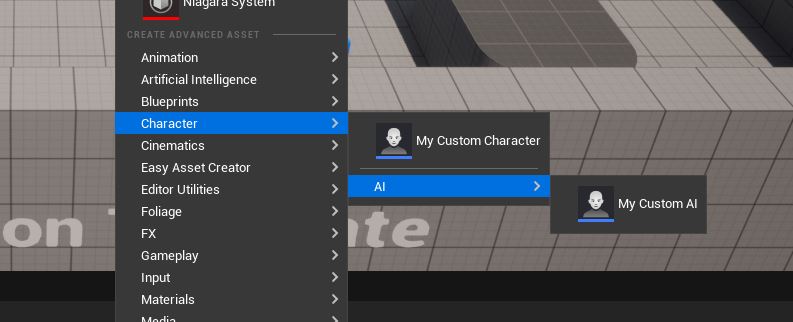
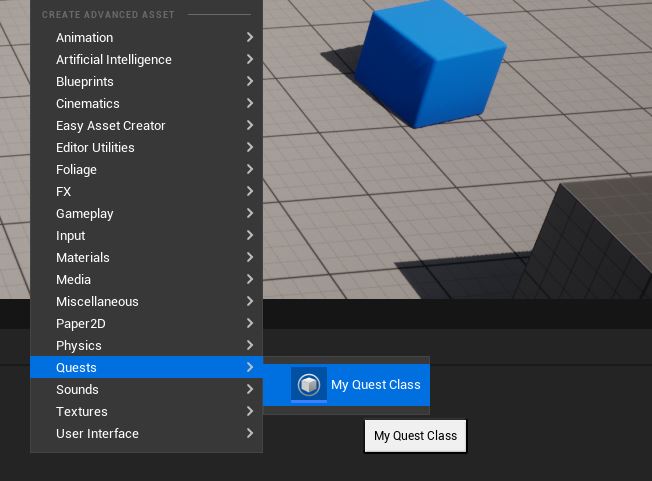
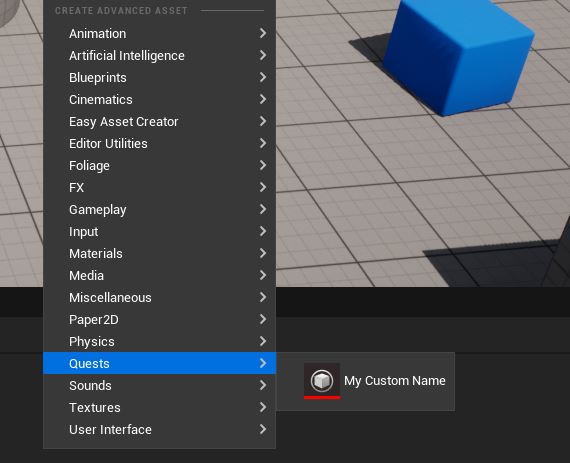
Now you should be able to see your class in the “Create Advanced Asset” menu:
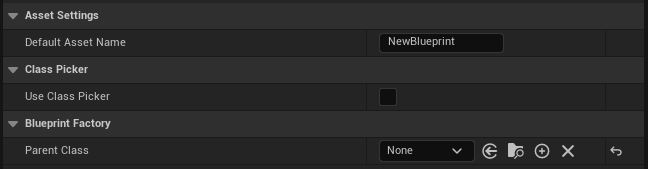
Default Asset Name
If you want to give the asset a custom default name once its created, assign it here:

Use Class Picker
If true, summons a class picker when you click to create a new class in the category menu:
Asset appearance
Asset name & tooltip
You might not want the default asset name/tooltip to be displayed when hovered, and that is an easy fix.
Go into the class you have exposed with the Asset Action and click on Class Settings, and this should show up:
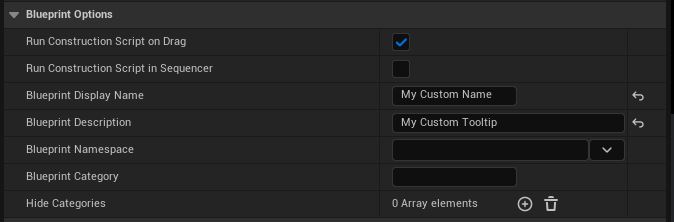
Change to what you want under Blueprint Display Name and Blueprint Description, and compile and save.
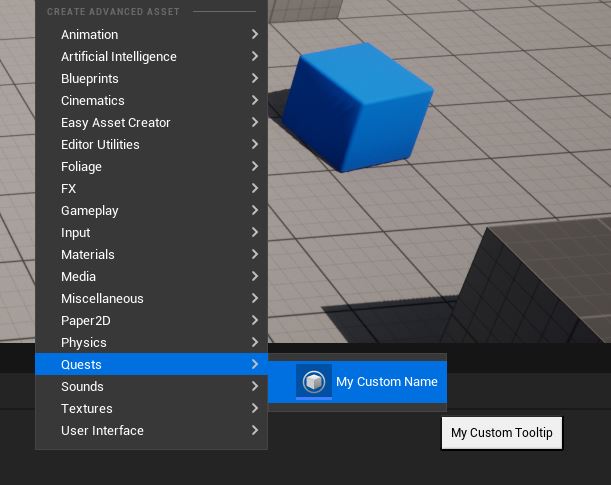
Now your asset should be displayed with the new name and tooltip:
Asset color
To change the color of the class in the menu, go into your Asset Action and change the color under Asset Color
Note: This will not change color of the asset once its created due to engine back-end stuff.

Now your asset will appear in a different color:
Asset Action Fragments
Fragments are used in Asset Actions to add different functionalities to the asset in the editor.
Add to Place Actors Menu
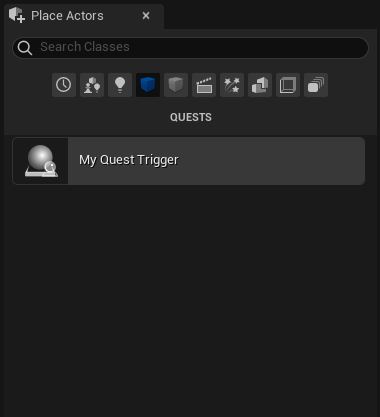
To add a Actor to the “Place Actors” menu. All you need to do is add this fragment to your Asset Action:
Now your Actor should be registered to the menu in its category!
Note: You don’t need a factory to add this functionality to an asset. Just need an Asset Action with a valid asset class assigned, category, and this fragment.
Add Content Browser drag drop support
Drag any of your assets into the viewport from the content browser. Works with any assets that derive from UObject.
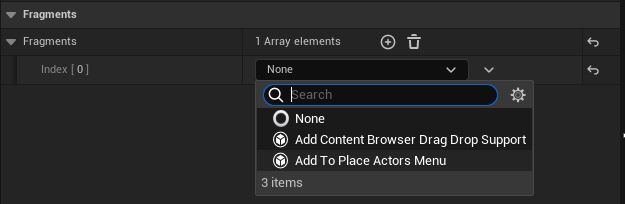
Add the drag drop support fragment to the Asset Action:

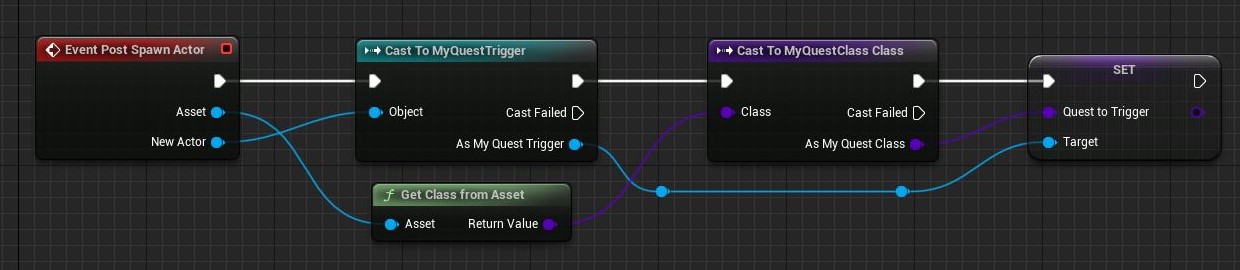
Add custom functionality to what will happen when the asset has been dragged into the viewport. Just override the function PostSpawnActor in the Asset Action.
In the example below, we drag a quest into the viewport, the Asset Action spawns the quest trigger we assigned, and then assign the quest class to that quest trigger.
Now the asset should behave like this:

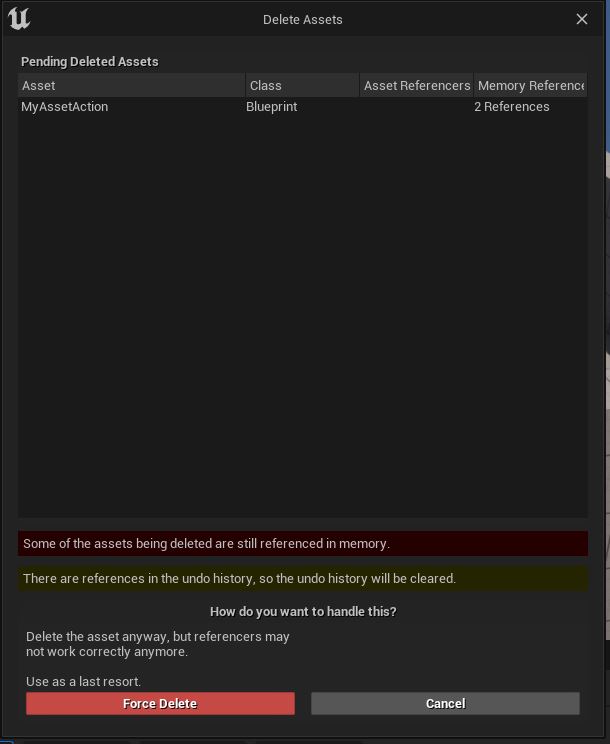
Deleting assets
You can delete any Asset Action or Asset Factories without any dangerous impact. It might say it still has memory references left and you have to force delete the asset, but the plugin handles that.
Common issues
My class won’t update its name in the menus
Try to save and compile the class.
My class doesn’t show up in the create asset menu
Make sure you have an Asset Action with a category and class assigned, as well as an Asset Factory with the same class assigned to Parent Class as in the Asset Action.